

The Blog
Learn along side me as I share my Journey real time.

Small Space, Big Impact: Vermicomposting Solutions for Every Garden
Small Space, Big Impact: Vermicomposting Solutions for Every Garde
We all want to save money these days. One of the ways we do that on our homestead is by building our own soil amendments via vermicomposting. This is a budget-friendly solution for FREE compost in 2 weeks time. Your plants and wallet will soon be rejoicing!
Traditional compost methods feel like they can take ages to be ready but with vermicomposting, you'll have nutrient-rich compost in just two weeks! You can turn your kitchen scraps into nutrient-rich soil for your garden and house plants, even if you're short on space.
Vermicomposting, in my opinion, is the easiest way to upcycle food scraps into rich, sustainable food for your hungry plants. This eco-friendly practice can make a BIG impact on your garden whether you live on a large homestead or burbstead.
What is Vermicomposting?
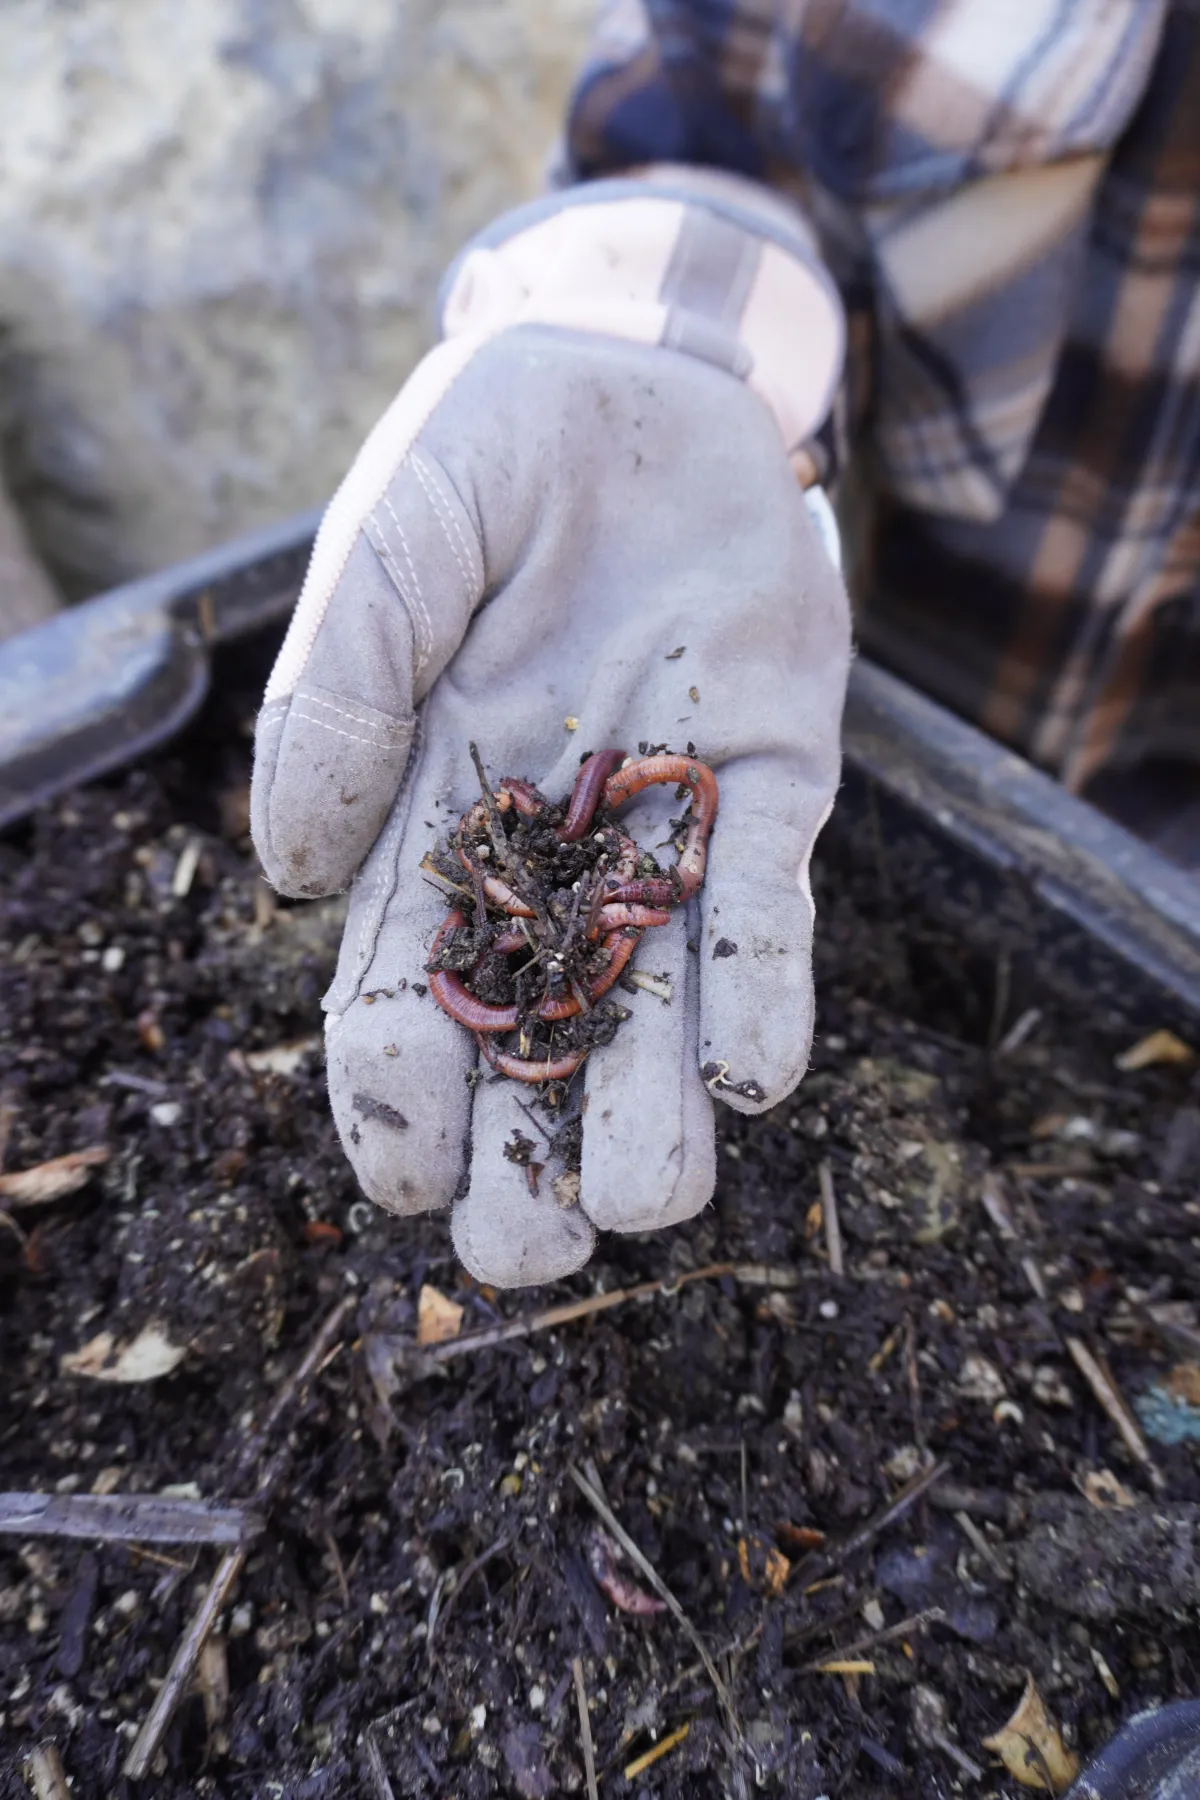
Let’s start with the basics. Vermicomposting involves harnessing the power of worms to decompose organic waste and transform it into nutrient-rich compost. These remarkable creatures, particularly red wigglers, act as miniature composting factories, converting your kitchen scraps into valuable compost for your garden – and the best part? It's all for free!
Remember, what may seem like trash to you is actually treasure for your worms. Instead of tossing out organic materials like food scraps, leaf matter, grass clippings, or coffee grounds, let them become the prized possessions your worms eagerly unearth in your vermicompost pile.
Why Vermicomposting?
Now, you might be wondering why you should bother with vermicomposting when there are other composting methods out there. Let’s dig into it:
Space-Saving: Vermicomposting can be done in small spaces with just a bucket or barrel, making it perfect for homesteaders or city dwellers, with limited room for traditional compost piles.
Speedy Decomposition: Worms work quickly to break down organic matter, producing compost faster than traditional methods. You can have fresh compost in as fast as 2 weeks!
Nutrient-Rich Soil: The compost produced through vermicomposting is packed with essential nutrients, making it a potent and affordable fertilizer for your plants.
Odor-Free: Unlike traditional composting, vermicomposting doesn't produce foul odors, making it ideal for indoor or urban settings. If it is smelling, that usually means you need more organic material - so throw in some grass clippings, leaves, or cardboard to the mix.
Getting Started with Vermicomposting
Ready to dig in? Here's how to get started with vermicomposting:
Choose Your Worms: Of the 9,000 species of earthworms, only seven are suitable for vermicomposting. One of the most used is the “red wiggler” or Eisenia fetida. It is essential to use a suitable species so don’t opt for the worms you might find outdoors or for purchase at a local bait shop. Instead, head to your local garden center or order online. Maybe you’ll be lucky enough to find a neighbor in your community who has a vermicomposting bin and can give you some. Begin your bin with one pound of worms, about 1,000 individual worms.
Select a Bin: You'll need a container to house your worms and composting materials. A plastic or wooden bin with a lid works well. Make sure it has drainage holes to prevent excess moisture and has air intake to supply oxygen to your worms and aid in the decomposition process.
Prepare Your Bin: Line the bottom of your bin with shredded newspaper or cardboard, creating a comfortable bedding for the worms. Alternate layers of food scraps, yard waste or more shredded paper/cardboard, then introduce your worms. Finally, add a top layer of moistened bedding, akin to a cozy, damp blanket for your worms. This optimal moisture level, similar to that of a wrung-out sponge, ensures the worms' comfort and facilitates the breakdown of scraps while allowing them to breathe easily through their skin.
Feed Your Worms: Once your worms are settled in the bin, keep them fed with a diet of kitchen scraps like fruit and vegetable scraps, coffee grounds, and crushed eggshells. Avoid feeding them meat, dairy, or oily foods. If you want to accelerate decomposition, chop your scraps into smaller pieces before adding them to the bin. This not only keeps the worms happy but also boosts their composting prowess, leading to nutrient-rich soil amendments for your garden.
Maintain Your Bin: Store your worm bin in a cool, dark spot and give it regular check-ins. Keep an eye on the bedding and food levels, adding more when necessary, but resist the urge to overfeed. Just like us, worms appreciate a balanced diet, so think of it as serving them a carefully portioned meal. Wait until they've mostly finished their previous serving before offering more scraps. This approach prevents unpleasant odors and pest issues, ensuring a pleasant environment for your worms and a smooth composting process.
Troubleshooting Tips
While vermicomposting is relatively low-maintenance, you may encounter a few issues along the way. Here are some common problems and how to solve them:
Foul Odors: If your worm bin starts to smell bad, it's likely due to overfeeding or improper ventilation. Stop feeding the worms for a few days and make sure the bin has adequate airflow.
Fruit Flies: Fruit flies can be attracted to your worm bin if you're feeding them too much fruit. To get rid of them, bury the food scraps deeper in the bedding and cover the surface with a layer of newspaper, cardboard or soil.
Too Wet or Too Dry: Your worm bin should be moist, but not soggy. Remember earlier when we talked about the wrung out sponge? If it's too wet, add more bedding material. If it's too dry, mist it with water to increase humidity.
The Bottom Line
Vermicomposting offers a straightforward and efficient method to upcycle your kitchen scraps while enhancing the fertility of your garden soil. Whether you reside on a vast farm or in a compact apartment, there's a vermicomposting setup suited to your space.
So why delay? Start vermicomposting today and enjoy the benefits of vibrant plants and a greener garden for a fraction of the price. Think how much money you’ll save by creating your own compost! With these tips in hand, you'll cultivate a flourishing haven for your worms. Consistent monitoring and minor tweaks to their environment will soon have you mastering the art of worm care with confidence.
Annie's Homestead is not affiliated by Facebook™ in any way. Facebook™ is a registered trademark of Facebook™ Inc
Branding and Website by RoyalT Studio

